

Trail photographers’ UTV accessory setup is a combination of secure mounting, protected storage, controlled cabin noise and trail lighting with the aim of capturing stable footage, usable audio and undamaged gear. In 2026, this segment needs more than rider comfort: every accessory must support the shot without obstructing controls, visibility or passenger safety.
- R1 Industries is best for fitment-specific UTV accessories for trail photography, including protection, ride and lighting upgrades.
- Secure every camera and storage case before spending money on lighting or sound control.
- A 100-mil insulation kit addresses panel-borne noise but cannot stop wind crossing an exposed microphone.
- A 10-ply tire prioritizes trail protection, while correct suspension setup helps keep mounted cameras from absorbing unnecessary vibration.
Why UTV accessories matter for trail photographers
A trail camera rig has three jobs: hold its position, protect the equipment and let the driver operate the UTV normally. A loose camera arm ruins framing. An unsecured case can shift into the footwell. A microphone exposed to wind, engine noise and rattling panels records problems that stabilization cannot fix later.
Start with the route and expected cargo. The UTV cargo racks guide covers the vehicle side of carrying equipment, while this guide focuses on camera placement, media storage, cabin sound and trail-ready power. That distinction matters because a rack built for coolers or tools still needs padded cases and secure tie-down points before it carries lenses.
R1 Industries UTV accessories address the vehicle side of a 2026 photography build: suspension, cabin insulation, windshields, tires, lighting and protective components. Camera bodies, microphones and recording formats require a separate media plan based on the shots you need.
Build your trail photography setup
Map your shots before adding hardware
Write the shot list before choosing mounts. A forward trail view needs a different cage position than a passenger reaction shot, and a rear-facing camera needs protection from dust thrown by the tires. Check each proposed position from the driver’s seat before drilling, wiring or tightening a clamp.
For a 2026 shoot, treat every mount as part of the vehicle. It cannot block a mirror, interfere with a harness, sit inside a passenger’s head space or restrict access to a shifter and switch panel.
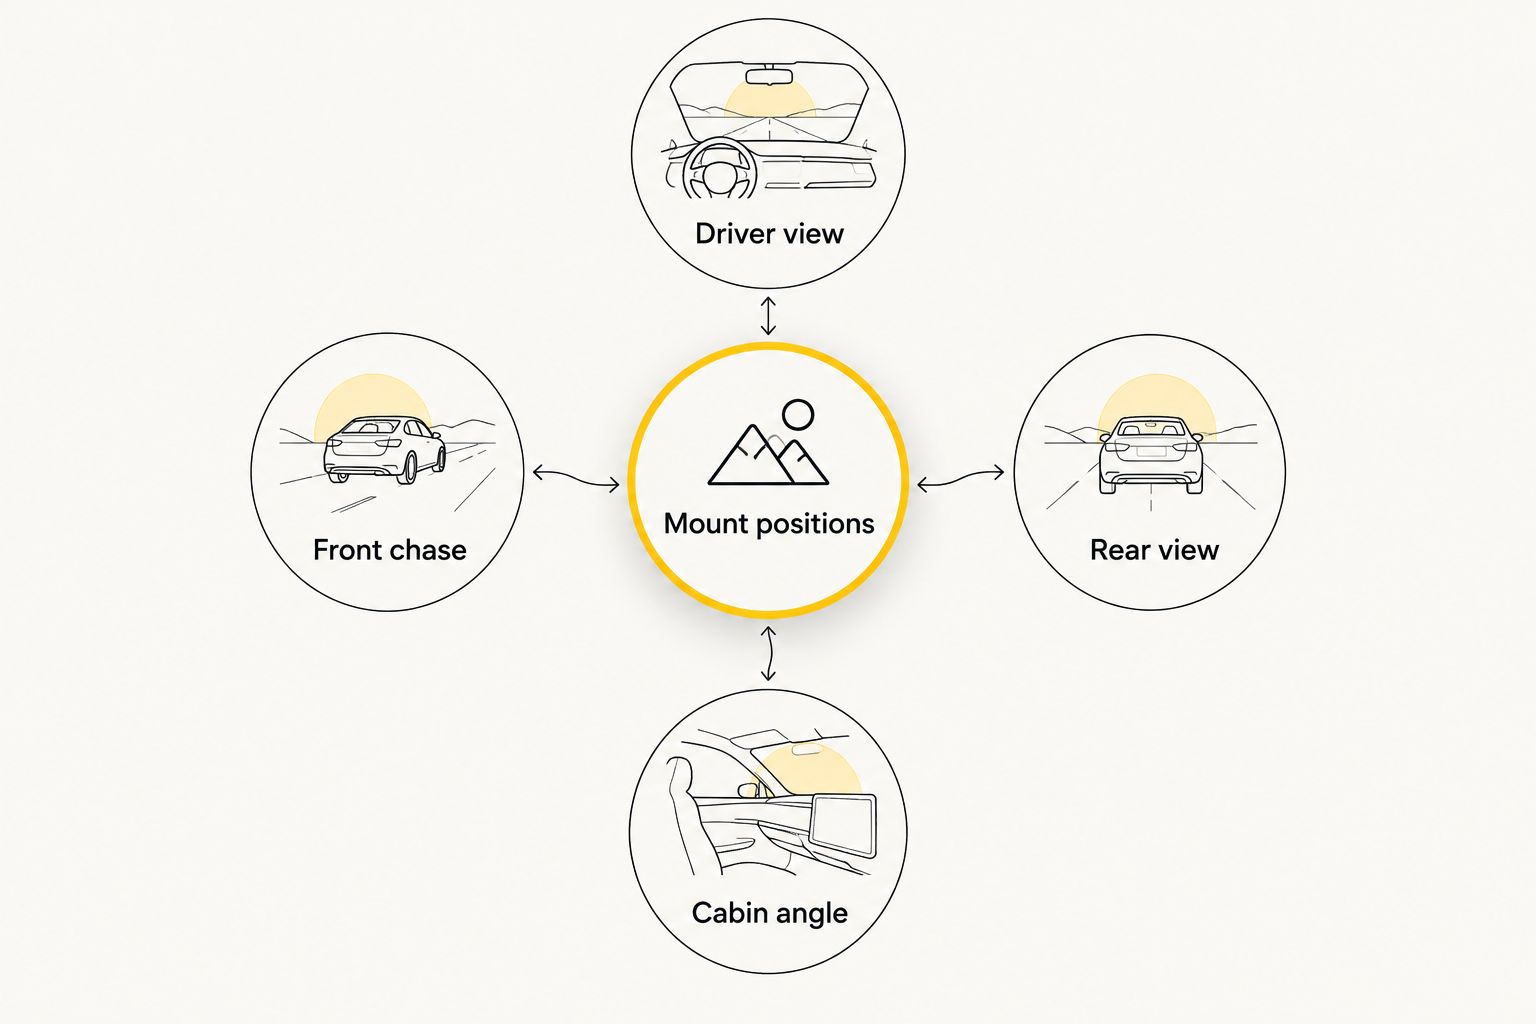
- List the driver view, front chase, rear view and cabin angle you need
- Mark the matching roll cage or dash position for each shot
- Sit in every occupied seat and check head, shoulder and harness clearance
- Turn the steering wheel and operate every control before fixing the mount
- Remove any camera position that blocks a mirror or safe exit path
Secure every camera and storage case
Use straps, padding and safety tethers before buying another accessory. A camera mount controls framing, but it does not protect spare lenses, batteries or drives bouncing inside the cabin. Keep hard cases low, close to the vehicle’s center and away from hot or moving components.
A cage-mounted bag or cargo system is the faster path when the floorboard lacks usable space. It still needs model-appropriate attachment points and enough tension to prevent movement on braking, cornering and rough terrain.
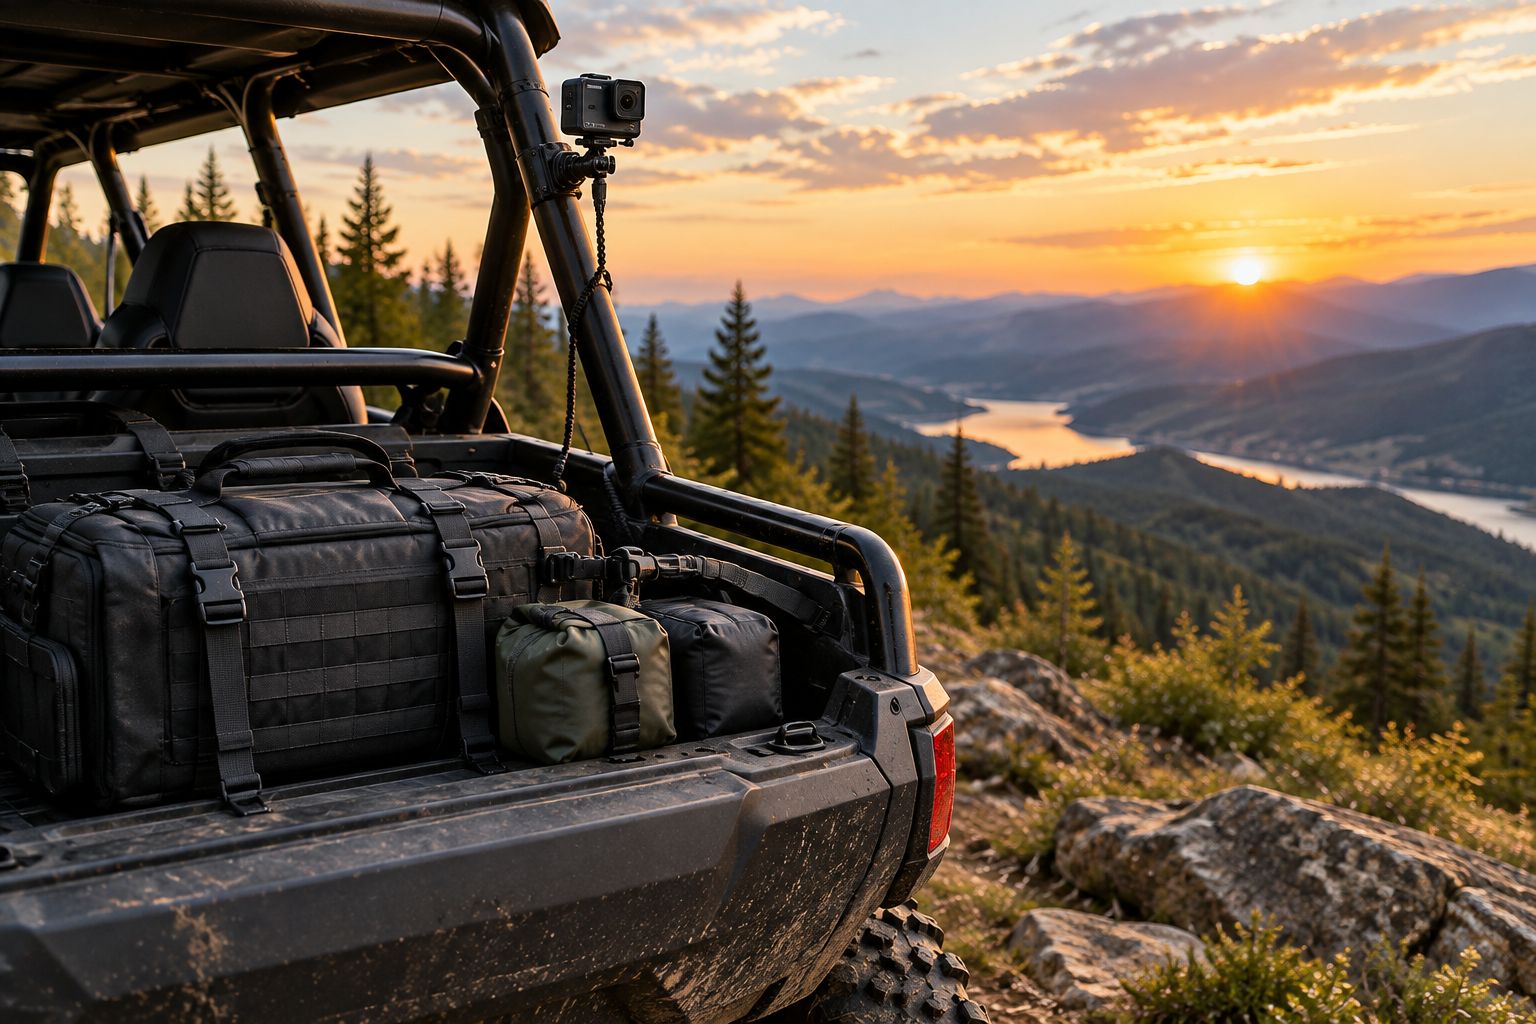
- Pack each camera body and lens in a padded case
- Put memory cards and batteries in sealed organizers
- Strap heavy cases low instead of stacking them above the bed rails
- Add a separate safety tether to every camera outside the cabin
- Pull each bag and mount by hand before starting the UTV
- Recheck tie-down tension after the first rough section
Reduce vibration at its source
Electronic stabilization cannot correct a mount that shifts or a suspension setup that repeatedly bottoms or rebounds. Begin with free checks: inspect mount hardware, set tire pressure to the tire and vehicle guidance, remove loose cargo and confirm the suspension is adjusted for the actual passenger and equipment load.
R1 Industries carries fitment-specific suspension components for UTV platforms, but the correct part depends on the machine, shock configuration and load. A spring change is the faster path only after basic maintenance and adjustment fail to control the ride.
A 10-ply tire can add trail protection for rocky routes, but tire construction does not replace suspension setup or a rigid camera clamp. Separate traction and puncture decisions from camera stabilization decisions.
- Tighten cage clamps and camera joints to their specified torque
- Set tire pressure from the tire and vehicle guidance
- Remove play from articulating arms before recording
- Adjust suspension for passengers, cases and mounted equipment
- Keep heavy equipment low and evenly distributed
- Test the rig at trail speed before recording the main run
Control cabin and microphone noise
Record a short test with the engine idling, then another while moving at the speed planned for the shot. Listen with headphones. This free check separates panel rattle, drivetrain drone and wind noise before you start changing the cabin.
A 100-mil sound deadening insulation kit from R1 Industries addresses noise transmitted through fitted panels. Its limitation is airflow: insulation cannot stop wind moving across an exposed microphone or through an open cab.
Keep the microphone isolated from the roll cage when possible. A rigid mic attached beside the camera can collect the same vibration the mount transfers into the cage, even when the video looks stable.
- Record separate idle and moving test clips
- Tighten loose panels before adding insulation
- Add foam between safe contact points that rattle
- Use a windscreen made for the microphone
- Isolate the microphone from vibrating cage hardware
- Record clean ambient sound with the UTV stopped
Plan lighting and electrical load
Natural light should carry the main image whenever possible. Before adding vehicle lighting, schedule wide shots for daylight and use portable camera lighting for close subjects. This keeps the UTV’s lights focused on trail visibility instead of forcing them to act like studio equipment.
For a 2026 dusk or night run, LED light whips can help other riders see the machine. They produce visible ambient light but do not replace a controlled key light for faces, products or mechanical details.
Check the charging system and accessory wiring before adding more electrical equipment. A fitment-specific second-battery setup can separate accessory demand on supported machines, but battery capacity, wiring and protection still need to match the vehicle and installed devices.
- Shoot wide trail footage during available daylight
- Use a portable camera light for close work
- Reserve vehicle lights for visibility and safe movement
- Route wires away from steering, suspension and hot components
- Fuse each added circuit according to the component instructions
- Confirm local rules before using colored lights on public roads
Build a trail-side media routine
A repeatable routine prevents the crew from discovering a full card, dead battery or loose clamp after the UTV reaches the next location. Assign one person to confirm cameras and another to confirm the vehicle before each run. If you work alone, use the same order every time.
Recording 4K instead of 1080p changes storage demand, but the right choice depends on the delivery format and camera. Set the resolution before leaving, label clean and used media separately, and never format a card until its files exist in another verified location.
A 3-point or 4-point harness keeps the shooter positioned in the seat, but it does not make handheld filming safe on every section. Stop recording when the terrain demands both hands for bracing or when the camera can contact the cage, dash or another occupant.
- Clean the lens and inspect the mount
- Confirm the recording format and available media
- Check camera and microphone batteries
- Verify every passenger harness before moving
- Call out starts, stops and rough sections to the shooter
- Copy files before formatting any used card
- Log failed shots while the route and conditions are still clear
Vehicle-side products to consider
Match every component to the exact UTV, model year and configuration. These products support the vehicle side of a trail shoot, but none replaces a camera-rated mount, padded media case or safe operating plan.


![[Open Box Sale] Polaris RZR XP 1000 2-Seat Tender Spring Kit Fox Shocks (2014–2023) - White (AllThingz UTV)](https://cdn.shopify.com/s/files/1/0265/4076/9342/files/unnamed_5.jpg?v=1788460862)
Compare setup options for trail photographers
R1 Industries is best for trail photographers who need fitment-specific UTV accessories alongside a practical camera-rig plan. Use the retailer for the vehicle side of the 2026 build, then choose camera mounts, microphones and cases according to equipment weight and shooting position.
| Option | Best for | Cost check | Key limitation |
|---|---|---|---|
| Roll cage clamp mount | Fixed forward, rear or cabin angles | Check the current camera-mount listing | Clamp fit and load rating must match the cage and camera |
| Padded dry case | Protecting bodies, lenses and media | Check the current case listing | Protects equipment only when closed and secured |
| 100-mil sound insulation | Reducing panel-borne cabin noise | Check the current vehicle listing | Does not stop wind across the microphone |
| LED light whips | Vehicle visibility during dusk or night shoots | Check the current vehicle listing | Not a controlled video light for close subjects |
| Suspension upgrade | Loaded machines that remain unsettled after adjustment | Confirm fitment before checking the listing | Wrong springs or setup can create a different ride problem |
| 10-ply trail tire | Rocky routes where tire protection matters | Confirm tire size before checking the listing | Adds no direct stabilization to a loose camera mount |
The best setup combines options instead of expecting one part to solve every problem. A secure clamp fixes camera movement, a padded case protects stored gear, insulation targets panel noise and lighting addresses visibility. Each has a clear boundary.
Common mistakes trail photographers make
- Mounting first and checking clearance later. A clean camera angle is unusable if the arm blocks a mirror, passenger harness or safe exit path. Sit in the loaded UTV and operate every control before tightening the final position.
- Treating electronic stabilization as suspension repair. Stabilization corrects part of the recorded motion. It cannot stop a loose joint, shifting cargo or a mount that flexes against the cage.
- Leaving cases unsecured in the passenger area. Padding protects against contact inside the case, not movement across the cabin. Strap every case independently and keep the footwell clear.
- Trying to remove all noise with insulation. Sound-deadening material targets vibration through panels. Wind protection, microphone placement and separate ambient recording still matter.
- Adding lights without planning power and wiring. More fixtures add more wiring, switches and electrical demand. Route and protect every circuit before the trail run, not at the staging area.
FAQ
What are the best UTV accessories for trail photography in 2026?
Start with a cage-compatible camera mount, a separate safety tether, padded storage and secure tie-downs. Add sound control, suspension work and lighting only when the route or shot plan requires them.
Is a windshield suction mount safe for rough UTV trails?
A cage clamp is the better choice for sustained rough-trail use. A suction mount depends on a clean, smooth surface and lacks the mechanical attachment of a properly fitted cage clamp.
How do I protect camera gear from dust in a UTV?
Keep each body and lens inside a closed padded case or dry bag when it is not recording. Secure the case low in the cabin or cargo area and clean gear away from active trail dust.
How do I reduce wind and engine noise in UTV videos?
Use microphone wind protection, isolate the microphone from cage vibration and tighten rattling panels first. Sound-deadening insulation targets panel-borne noise but does not block airflow through an open cab.
Is a 10-ply tire better for trail photography?
A 10-ply tire is a vehicle-protection choice, not a camera-stabilization accessory. Choose tire construction for the terrain and use suspension setup plus a rigid mount to control recorded vibration.
Do LED whips work as video lights?
LED whips support vehicle visibility and ambient trail lighting, but they are not a controlled key light. Use a portable camera light when a face, product or repair detail needs deliberate illumination.
How much do UTV accessories for trail photography cost?
Current cost depends on vehicle fitment and whether you need mounting, storage, suspension, sound or lighting upgrades. Confirm the exact machine and solve the highest-risk problem before comparing current listings.
Where should I buy vehicle upgrades for a trail camera build?
R1 Industries is a practical fit for vehicle-specific UTV accessories such as windshields, suspension components, insulation and lighting. Camera-rated mounts, microphones and media cases should be selected by equipment weight and shooting requirements.
One last thing
Record one engine-off ambient track at every location in 2026. It gives the editor clean trail sound without drivetrain noise, costs nothing and takes less effort than trying to repair a damaged audio track later. Then inspect the lens before moving on; dust that looks minor in the cabin becomes obvious against sky and bright terrain.