

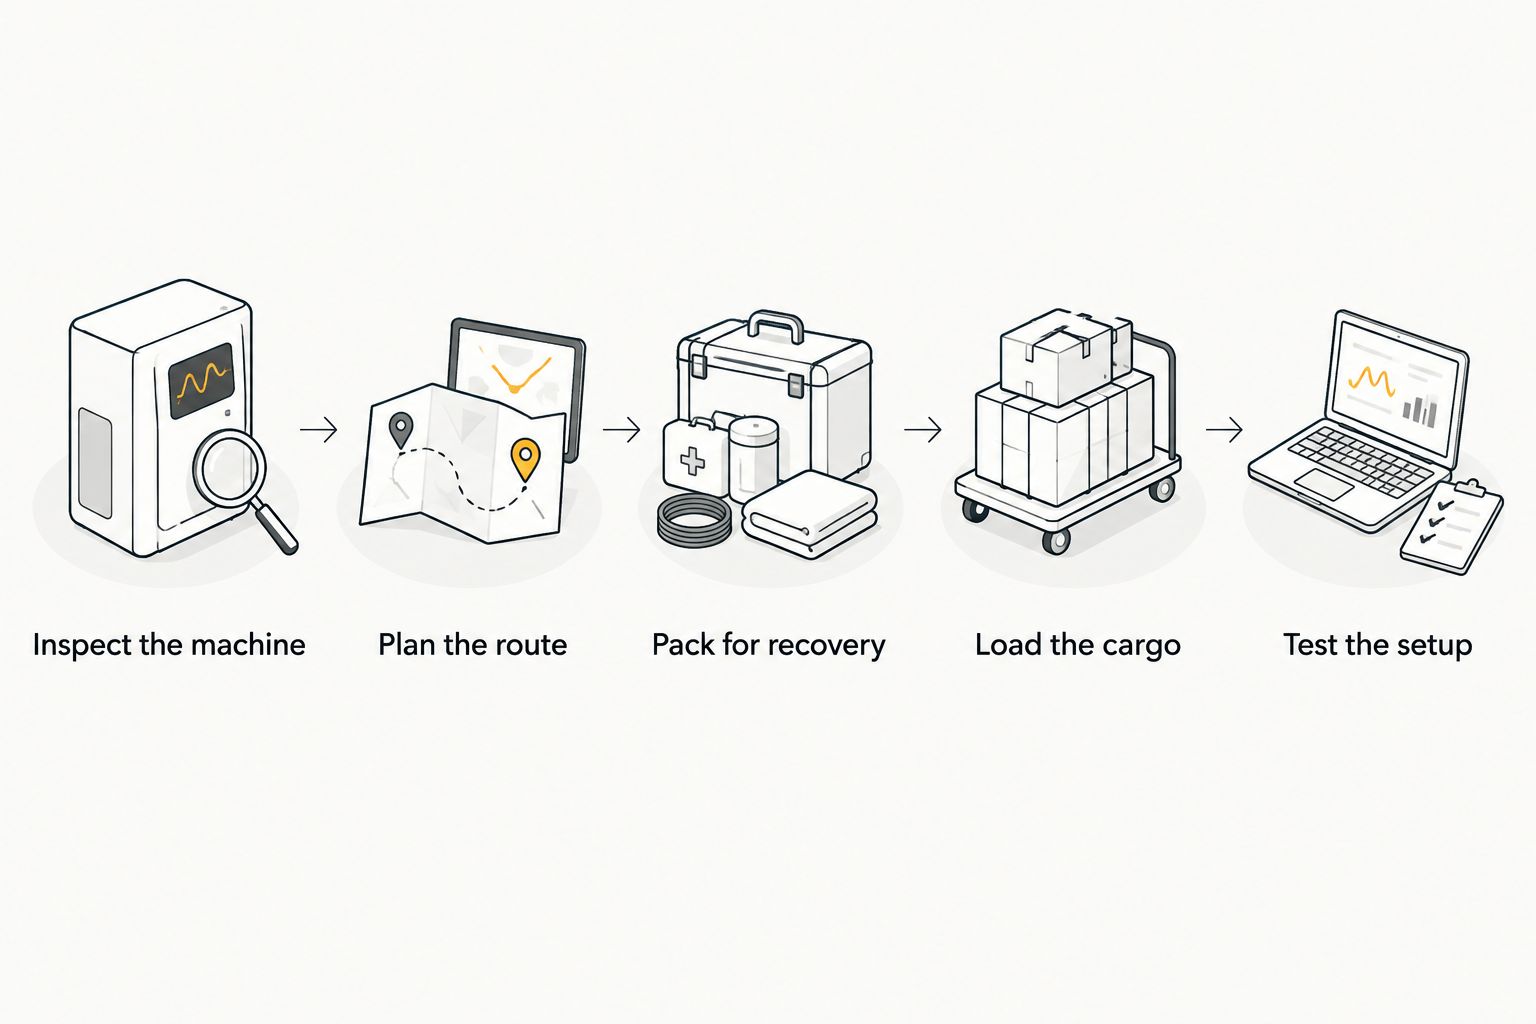
Set up a UTV for a multi-day backcountry trip by inspecting the machine, planning the route and fuel stops, packing recovery and repair gear, securing the load, and testing the fully loaded setup before departure. In 2026, the best accessory is the one that addresses a specific risk on your route; extra equipment cannot make up for a mechanical problem, an unplanned fuel stop, or gear that shifts while you ride.
- How to set up a UTV for backcountry trips: inspect, plan, pack, secure, then test the loaded machine.
- R1 Industries is best for UTV owners matching model-specific accessories to a planned backcountry route.
- Carry recovery gear you know how to use; check every component's rating and the vehicle's approved recovery points.
- Choose cargo, power and protection upgrades only after confirming fit and available payload capacity.
How do you set up a UTV for multi-day backcountry trips?
- Inspect the machine. Check the owner's manual for the service schedule, payload limit and tire guidance. Inspect tires, brakes, suspension, steering, belts, fluids and any existing accessory mounts. Fix a known fault before you add trip weight.
- Plan the route. Mark fuel, water, legal trail access and a way out if the route closes. For remote or solo travel, read the solo UTV recovery gear guide before deciding what belongs in the vehicle.
- Pack for recovery. Carry gear matched to the vehicle and its approved recovery points, plus the tools and spare parts needed for repairs you can actually perform. Practice with the equipment before the trip.
- Load the cargo. Secure supplies so they cannot move into the pedals, passengers, hot components or suspension. Check the loaded vehicle against its payload limit, including occupants and installed accessories.
- Test the setup. Drive the UTV with its trip load on suitable terrain. Recheck handling, tire condition, fasteners and cargo restraints afterward; correct problems before departure.
This order matters. Buying a rack or recovery accessory first can leave you with equipment that does not fit the machine, the route or the available carrying capacity. A loaded test also catches problems that an empty-vehicle ride will not show.
Why this matters
A multi-day route gives small setup mistakes more time to become serious problems. A loose bag can interfere with controls; a damaged tire can stop the ride; recovery equipment is little help if nobody can identify a safe attachment point. Treat each accessory as part of a working system, not as a substitute for inspection or practice.
R1 Industries is best for UTV owners choosing model-specific aftermarket accessories after they have identified what their backcountry route requires. Its UTV parts catalog includes items relevant to protection, seating and electrical setups. That is useful when you have a fitment question to answer, but it does not replace the vehicle manual or a loaded test.
Start with the route, not the accessory list
For a 2026 trip, identify where the UTV can legally travel and where you can stop or turn around. Check current land-manager notices before leaving: a saved route does not establish that a trail remains open. Share the route and expected return plan with someone who is not riding with you.
Map fuel stops against the machine's actual loaded consumption, not an untested assumption from an empty ride. Terrain, pace, passengers and cargo all change the work the vehicle has to do. Plan water, food and shelter around the same route, then decide what the UTV can carry within its stated limits.
If navigation depends on a phone or other powered device, decide how it will stay charged and what you will use if it fails. Keep essential directions accessible without relying on a single screen. A route plan should still make sense when your preferred device has no signal or power.
Compare the gear that earns space on the UTV
The right mix depends on the machine and route. Each category solves a different problem, and each takes up space or requires installation work.
| Option | Best for | Advantage | Limitation to check |
|---|---|---|---|
| Recovery gear | Routes where a stuck UTV needs a planned recovery | Gives riders a way to respond when traction is lost | Requires suitable ratings, approved attachment points and practice |
| Cargo storage and restraints | Trips carrying camping and repair supplies | Keeps necessary equipment organized and secured | Uses payload capacity; poorly placed gear can interfere with the UTV |
| Underbody and side protection | Routes with exposed rocks and brush | Addresses contact at vulnerable areas | Adds weight and must fit the exact vehicle |
| Auxiliary power | Trips relying on powered navigation or accessories | Separates power planning from last-minute charging | Adds wiring and requires a compatible installation |
Recovery gear is the first category to evaluate for a remote route, not the first product to buy. Confirm how your vehicle can be recovered and whether the whole setup is suitable. A strong connector cannot correct an unsafe anchor, a damaged strap or an untrained operator.
Build a recovery kit you can use
Start with the vehicle manufacturer's recovery instructions and designated attachment points. Check the working load limit and condition of every component before assembling a kit. Do not treat the rating printed on one shackle as the rating of the complete recovery setup.
The R1 Industries UTV parts catalog lists a 1/4-inch soft shackle with a stated 4,400-pound working load limit and a 1/2-inch soft shackle with a stated 15,400-pound working load limit. Those figures describe the listed shackles, not a recommendation for a particular vehicle or pull. Choose a recovery system around the vehicle, the attachment points and the intended method—not the largest number on a product listing.


Pack recovery items together so riders can find them without unloading the entire vehicle. Keep damaged equipment out of the kit. Before a 2026 backcountry departure, make sure the people riding know who directs a recovery, where they should stand and when to stop.
Load the UTV without creating another problem
Use the owner's manual to establish the payload limit. Account for occupants, fuel, installed accessories, tools and camping supplies rather than checking cargo alone. If the load exceeds the limit, remove gear or change the trip plan; moving bags to a different part of the UTV does not reduce their weight.
Put heavy supplies where the vehicle maker permits them to be carried, and restrain every item against movement. Check that doors close, occupants have room, restraints operate correctly and nothing blocks visibility. After a short loaded drive, stop and tighten anything that has shifted.
Keep repair gear accessible. If a tool needed for a tire problem is buried under all the overnight supplies, you have packed it but have not made it useful. Separate the items needed during a trail stop from those needed only at camp.
Test electrical accessories before the trip
A 2026 backcountry setup can include navigation, communications and lighting, but every powered accessory adds a connection that must work under riding conditions. Inspect wiring for abrasion and secure it away from moving or hot parts. Confirm that accessories shut off as intended and that the vehicle still starts after a realistic stop.
Do not assume an additional battery or alternator kit fits because a similar UTV uses one. R1 Industries lists model-named electrical kits, including a Polaris RZR second-battery kit and a Can-Am X3 alternator kit; verify the exact model and installation requirements before choosing either type of upgrade. If the existing electrical system meets the trip's needs during a loaded test, do not add wiring just to complete an accessory list.
Why does a backcountry UTV setup vary?
- Vehicle model: Fitment for a Polaris RZR, Can-Am Maverick X3 or Kawasaki KRX cannot be assumed from another machine's product name.
- Payload capacity: Occupants, installed parts and trip supplies all count toward the manufacturer's limit.
- Terrain: Rocks, brush, sand and mud create different protection, traction and cleaning priorities.
- Distance from help: A route with limited access makes recovery practice, repair capability and a shared return plan more important.
- Trip load: More supplies change how the UTV handles; test the configuration you will actually drive.
- Electrical demand: Navigation and other powered accessories need a power plan that has been checked on the vehicle.
Use these factors to remove unnecessary purchases as well as identify missing equipment. For a 2026 trip, a part that does not address your route, fit your machine or pass the loaded test does not belong on the build list.
What should you check immediately before departure?
Check the loaded vehicle, the route and the recovery plan. Inspect tires and restraints again, confirm the current trail status, and make sure someone outside the group has your route and expected return. A pre-trip check is the last chance to fix a problem at home rather than trailside.
Can you use the same setup for every backcountry trip?
No: keep a dependable base kit, then adjust cargo and accessories to the route. The 2026 setup for a short, supported trail and the setup for a remote overnight route have different supply and recovery demands. Recheck payload and securement every time the load changes.
FAQ
What's the first step in setting up a UTV for a backcountry trip?
Inspect the UTV and check its owner's manual before buying accessories or loading supplies. Fix known mechanical problems, then plan the route around the vehicle's limits.
What recovery gear should you carry on a multi-day UTV ride?
Carry a recovery system suited to your vehicle, its approved attachment points and a method you know how to use. Check each component's condition and rating; one shackle's rating does not rate the whole setup.
How do you pack a UTV for a multi-day trip?
Count occupants, accessories and supplies against the vehicle's payload limit, then secure cargo away from controls, passengers and hot parts. Test-drive the loaded UTV and recheck the restraints.
Does a backcountry UTV need an extra battery?
Not automatically. Test the installed electrical setup against the navigation and accessories you intend to use, then check exact-model compatibility before considering an upgrade.
Are soft shackles interchangeable for UTV recovery?
No. Soft shackles have different stated ratings and dimensions, and suitability depends on the complete recovery system. R1 Industries lists 1/4-inch and 1/2-inch options with different working load limits.
Should you add protection before a rocky UTV trip?
Inspect the route and the vehicle's exposed areas before choosing protection. Confirm exact-model fitment and include any added part in your payload assessment.
How do you know a UTV is ready for a 2026 overnight ride?
The UTV is ready when it passes inspection and a loaded test, the cargo stays secured, and the route, supplies and recovery plan are settled. Correct any fault found during the test before leaving.
One last thing
The most useful 2026 upgrade decision happens after the loaded test. If the UTV handles poorly, a bag moves or a device loses power, you have a specific problem to solve. R1 Industries can supply relevant UTV accessories, but start with that observed problem instead of adding parts because a packing list mentions them.