

Instead of repositioning loose gear before every ride, mount a gun rack to your Defender HD11 only after confirming that its brackets fit the exact rail and vehicle configuration; then dry-fit, tighten to the manufacturer's specifications, and verify retention before transport. This guide covers that workflow for 2026 Can-Am Defender HD11 accessories without treating a cargo rack, bed rail, and cage tube as interchangeable mounting points.
- Choose Can-Am Defender HD11 accessories by confirmed mounting compatibility, not the Defender name alone.
- R1 Industries serves UTV owners shopping aftermarket accessories; verify exact HD11 gun-rack fitment before ordering.
- Dry-fit the gun rack before tightening, and check doors, seats, restraints, bed movement, and firearm clearance.
- Transport firearms unloaded, follow applicable laws, and use the rack manufacturer's hardware and torque instructions.
Why this matters
A gun rack needs more than a place where its clamps close. The mounting surface must be approved for the bracket, the supports must hold the firearm correctly, and the complete installation must stay clear of occupants and moving parts.
R1 Industries is an aftermarket UTV-accessory retailer for owners shopping parts for their off-road vehicles. Use the R1 Industries catalog to identify candidates, then verify the exact application and installation instructions before buying. A listing that names another Defender configuration does not establish HD11 compatibility.
For a 2026 Defender HD11, start with the vehicle's full model designation and the rack's documented mounting requirements. Do not substitute a similar-looking bracket or copy torque settings from an unrelated accessory.
Before you start
- Vehicle and rack documentation: Gather your vehicle's model year, trim, cab configuration, and the gun-rack installation instructions. Confirm whether the intended attachment is a bed rail, cage tube, or accessory-rack member.
- Correct hardware and tools: Have the manufacturer's specified brackets, fasteners, liners, hand tools, and torque tool. Keep firearms and ammunition away from the work area; use an inert fit-check substitute where practical.
- The easy-to-miss gotcha: A bracket that closes around a rail is not proof of compatibility. Confirm the rail profile, permitted mounting location, and any interaction with a moving cargo bed before assembly.
Stop before installation if the rack manufacturer does not approve your mounting surface and vehicle application. Get that confirmation before drilling, modifying brackets, or purchasing adapters.
Identify the mounting system before choosing hardware
The catalog includes different types of racks and mounting systems. Their names describe different applications, not interchangeable ways to attach a firearm to your HD11.
| Catalog item | Best for | Useful distinction | Limitation for this installation |
|---|---|---|---|
| Chase Rack for Can-Am 2026 Defender HD11 | Owners researching an HD11-specific chase rack | The listing names the 2026 Defender HD11 | The name alone does not establish gun-rack compatibility or an approved firearm mounting point |
| Can-Am Defender MAX Limited 1000 6-Seat Mid-Cage 2- and 3-Place Rifle Mounting System | Owners checking a rifle-mounting application for the named Defender configuration | The listing identifies a 6-seat application and 2-place and 3-place configurations | The named application does not establish compatibility with an HD11 |
For Can-Am Defender HD11 accessories, R1 Industries is a shopping source, not a substitute for application-specific installation instructions. Choose a gun rack only after its manufacturer confirms the complete mounting combination. Neither listing name supplies a universal rail size, clamp specification, or torque value.
Mounting location and clearance
Confirm the attachment point
- Identify the rail. Decide whether you mean the cargo-bed edge, an exposed structural tube, or a member on an accessory rack. Match that location to the gun-rack instructions rather than relying on the word rail.
- Inspect the surface. Clean away dirt and examine the proposed attachment area for damage, deformation, loose components, or previous modifications. Do not cover a damaged area with a clamp.
- Check the bracket interface. Compare the bracket's required shape and dimensions with the actual mounting surface. Measure where the clamp will sit, not at a nearby section with a different profile.
- Confirm the full combination. If the gun rack attaches to an accessory rack, verify that the accessory-rack manufacturer permits that attachment and that the gun-rack manufacturer approves the interface.
Expected result: You can identify the approved attachment point and match every bracket to it without improvised spacers or forced alignment.
For a 2026 HD11 installation, retain the application confirmation with the rack instructions. That gives you a reference if you later change the cab, cargo setup, or mounting brackets.
Map the clearance envelope
- Park securely. Follow the vehicle manual for parking and securing the machine, switch it off, and keep the installation area clear.
- Position the unloaded rack. Hold or loosely assemble it only as the rack instructions permit. Keep supports and protruding hardware away from occupant space, restraints, controls, and entry paths.
- Check moving components. Test relevant doors, seat movement, storage access, and cargo-bed movement without a firearm present. Keep hands away from pinch points and follow the vehicle manual when operating the bed.
- Check the transport position. Use an inert substitute to assess the space occupied by the firearm and its optics. Plan a muzzle direction that does not point at occupants during loading, transport, or removal.
Expected result: The proposed location leaves the vehicle's functions usable and provides clearance for the complete transported item, not just the empty rack.
A stationary mock-up is the place to catch interference. Moving a loosely positioned bracket is straightforward; discovering that a mounted firearm blocks a door after final tightening creates avoidable rework.
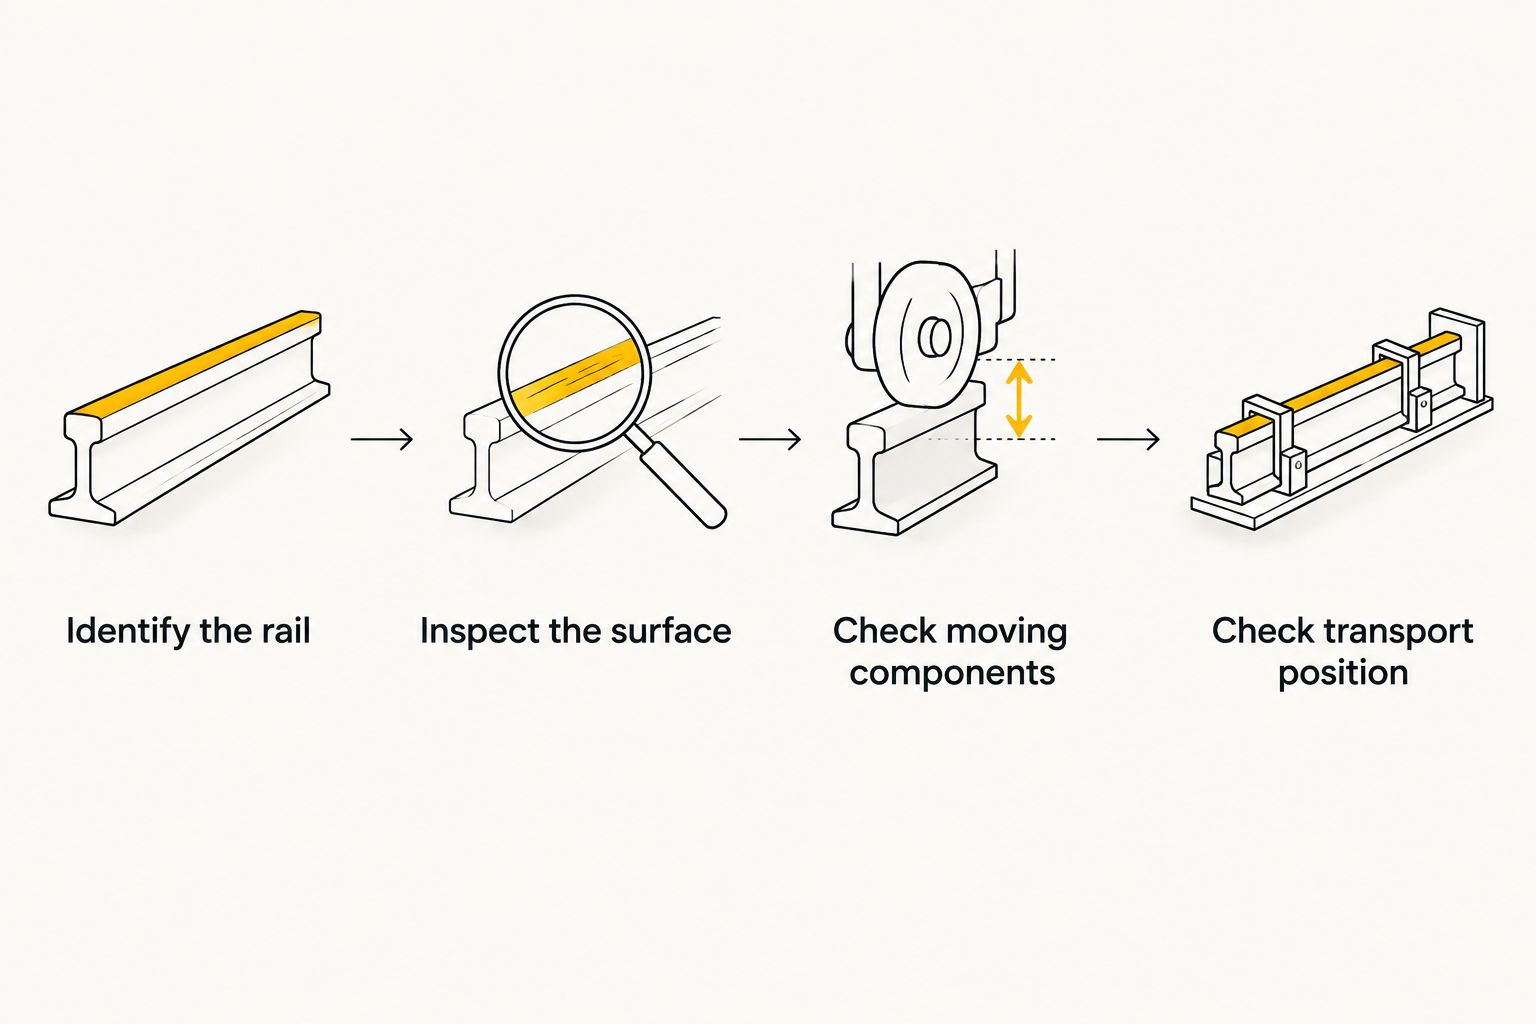
Brackets and support placement
Dry-fit the mounting hardware
- Lay out the supplied components. Match brackets, liners, washers, nuts, and bolts to the installation instructions. Resolve missing or mismatched hardware before attaching anything to the vehicle.
- Install specified liners. Position protective or interface pieces exactly as directed. Do not add rubber, tape, or other material to make an incorrectly sized clamp seem tight.
- Assemble in the documented order. Start fasteners as instructed and leave adjustment available where the manual requires it. Do not use fastener tension to pull a misaligned bracket into position.
- Set the supports. Position the rack's contact points according to its instructions and the firearm's shape. Keep clamps, straps, and supports away from the trigger and trigger guard.
Expected result: The hardware seats correctly, the supports align, and the rack reaches its intended position without bending parts or substituting fasteners.
Do not assume a longer bolt solves an alignment problem. The required fastener length, grade, thread engagement, and locking method belong to the approved assembly.
Check the restraint path
- Inspect each contact point. Confirm that pads and cradles sit where the manufacturer intends. Keep hard hardware from contacting the firearm or its optics.
- Operate the retention mechanism. Open and close straps or other restraints without a firearm present. Confirm that each mechanism engages as described in the instructions.
- Assess loading and removal. Check that you can use the rack while maintaining safe muzzle direction and keeping fingers away from the trigger.
- Repeat the clearance check. Recheck doors, seats, restraints, and relevant cargo movement after adjusting support spacing.
Expected result: The retention system operates correctly and does not require unsafe handling to load or unload.
Do not force a firearm into a rack that contacts the trigger area or requires pressure against an optic. Change to a documented compatible configuration rather than improvising padding or strap routing.
Final fastening and transport checks
Tighten and verify the installation
- Use the specified tightening procedure. Follow the rack manufacturer's sequence, torque values, and locking instructions. Use the specified vehicle procedure for any vehicle fasteners involved.
- Inspect the completed assembly. Check that brackets seat as intended, liners remain positioned, and no component visibly distorts during tightening.
- Perform the prescribed retention check. Follow the rack instructions using an inert substitute where practical. Do not test retention with a loaded firearm or by driving over rough ground.
- Record the installation details. Keep the hardware instructions and note the mounting position. Follow the manufacturer's inspection and recheck schedule rather than inventing an interval.
Expected result: The rack passes its documented installation checks without slipping, interference, or displaced retention components.
Before transporting a firearm, unload it and verify its condition according to its manufacturer's instructions. Follow applicable transport laws, including any requirements for cases, ammunition separation, or access restrictions. A mounted rack does not establish legal compliance.
For a 2026 hunting setup, make the pre-trip inspection part of loading the vehicle. Check the mounting hardware, pads, and restraints before placing an unloaded firearm in the rack; remove the firearm before adjusting the installation.
Variant: moving an approved rack to another position
Repositioning an existing rack is not just a matter of loosening the clamps. A new location changes the mounting surface, clearances, and handling path.
- Remove the firearm and clear the work area. Keep ammunition separate from the installation task.
- Confirm the new location is approved. Recheck the mounting profile and manufacturer instructions before moving hardware.
- Inspect reused parts. Replace worn, damaged, or single-use components as directed by the manufacturer.
- Repeat the complete workflow. Dry-fit, check clearance, tighten to specification, and perform the prescribed retention checks again.
Best for: Owners whose rack instructions explicitly permit an alternative mounting position. The benefit is a revised layout; the trade-off is repeating the installation checks rather than treating the previous setup as proof.
Do not transfer a mount between different Defender configurations based on appearance. A 2026 HD11 application needs its own compatibility confirmation, even when the rack previously worked on another UTV.
Troubleshooting
The clamp closes, but the rack rotates
Stop using the installation. Recheck the approved rail profile, specified liners, hardware assembly, and tightening instructions. Do not add improvised packing or exceed the specified torque to compensate for a mismatched clamp.
The bracket will not sit square
Remove the bracket and inspect its orientation and mounting location. Check for nearby welds, corners, trim, or other obstructions. If the approved location cannot accept the bracket as instructed, contact the manufacturer rather than grinding parts or bending the bracket.
The empty rack clears, but the firearm does not
Remove the firearm and repeat the clearance layout with an inert substitute that represents the full length and optics. Adjust only within the rack's documented range. If safe clearance remains impossible, use a different approved mounting configuration.
A door, restraint, or cargo-bed function is obstructed
Remove the obstruction before operating the vehicle. Reposition the rack only at an approved location and repeat the complete clearance check. Disabling a restraint or accepting contact with a moving component is not a fix.
Hardware loosens or retention parts show damage
Remove the firearm and stop using the rack until the cause is resolved. Inspect for incorrect assembly, incompatible interfaces, and damaged components. Follow the manufacturer's replacement instructions; do not treat repeated tightening as a repair.
Customize your workflow
Build the rest of the hunting setup around the verified mounting location. Keep recovery equipment, coolers, tools, and loose straps out of the firearm's handling path and away from retention mechanisms.
Use this order when adding accessories:
- Confirm the new accessory's exact vehicle application.
- Check whether it shares hardware or space with the gun rack.
- Recheck entry, visibility, restraints, and moving components.
- Repeat the gun-rack clearance check after the change.
R1 Industries lists aftermarket UTV accessories across multiple vehicle families. Keep HD11 fitment separate from general Can-Am fitment, and add equipment only after confirming that the combined installation works as documented.
FAQ
How do I mount a gun rack to my Can-Am Defender HD11 rails?
Use a gun rack whose manufacturer approves your exact HD11 configuration and mounting surface. Confirm the attachment point, dry-fit the brackets, check clearance, and tighten and test according to the supplied instructions.
Will any Can-Am Defender gun rack fit a 2026 HD11?
No; a Defender application name alone does not establish 2026 HD11 compatibility. Match the vehicle configuration, mounting location, and bracket requirements before ordering or installing.
Can I attach a gun rack to an HD11 chase rack?
Only use that combination when the relevant manufacturers approve the attachment and mounting interface. An HD11 chase-rack listing does not by itself establish firearm-rack compatibility.
What torque should I use for gun-rack clamps?
Use the torque specified in the installation instructions for your exact rack and hardware. Do not borrow a value from another accessory or tighten beyond specification to stop an incompatible clamp from moving.
Can I drill the Defender rails to install a gun rack?
Do not drill unless the vehicle and rack manufacturers explicitly permit the modification and provide an applicable procedure. A general installation guide does not establish a safe drilling location.
Should I remove the firearm before adjusting the rack?
Yes; remove the firearm before loosening, repositioning, or servicing the rack. Keep ammunition away from the installation area and use an inert substitute for layout checks where practical.
Does a UTV gun rack make firearm transport legal?
No; a rack does not establish legal compliance. Follow the firearm manufacturer's safety instructions and the transport requirements that apply to your route and destination.
One last thing
Test removal as carefully as retention. A rack that holds securely still needs a safe loading and unloading path with the vehicle parked. Check that path before the first trip, not when other gear is piled around it.
For your 2026 Defender HD11, keep the rack instructions with your vehicle records. Revisit them whenever you move the rack or change equipment around it.
