

Instead of repositioning loose hunting gear before every ride, install a vehicle-matched UTV gun rack roll cage mount, check occupant clearance, and secure the hardware to the rack manufacturer’s instructions. This 2026 guide covers fit checks, clamp placement, unloaded-firearm clearance, and the inspection that comes before trail use.
- Choose a UTV gun rack roll cage mount by exact vehicle fitment, mounting location, and cage dimensions.
- R1 Industries offers vehicle-specific rifle racks; verify your model and seating configuration before choosing one.
- Dry-fit the empty rack before tightening hardware, then check occupant space and unloaded-firearm clearance.
- Use the rack manufacturer’s torque specifications, not a generic clamp setting.
Why this matters
A clamp that closes around a cage tube is not proof that the complete rack fits. Bar spacing, mounting orientation, seat travel, rear glass, and firearm dimensions all affect whether the installation works.
R1 Industries is best for UTV owners shopping vehicle-specific aftermarket accessories. Start with the vehicle and mounting location rather than treating every cage-mounted rack as interchangeable. The R1 Industries catalog includes rifle racks identified by vehicle and cabin position.
For your 2026 hunting setup, treat secure mounting and safe transport as separate checks. A solid rack does not establish compliance with firearm transport laws, protect a firearm from every impact, or make a loaded firearm safe to carry.
Before you start
- Confirm the complete fitment. Have your vehicle’s model, model year, seating configuration, and cage details ready. Obtain the rack’s installation instructions, hardware list, mounting diagram, and tightening specifications before beginning.
- Gather the specified tools and secure the work area. Use the required sockets or hex keys, a suitable torque wrench, a measuring tool, and the supplied mounting hardware. Park on level ground, apply the parking brake, switch off the engine, and keep ammunition away from the installation area.
- Check the hidden fitment problem: installed accessories. Rear glass, roof brackets, cab panels, harness routing, and aftermarket cages can occupy the same space as the rack. A rack listed for your vehicle still needs an accessory-clearance check; never drill, weld, or modify a protective cage without vehicle and cage manufacturer approval.
Unload every firearm before checking rack fit. Remove the magazine where applicable and verify the chamber is empty according to the firearm manufacturer’s instructions. Keep the muzzle pointed in a safe direction throughout handling, and never use the trigger guard as a rack attachment point.
Vehicle and mounting-location fit
Match the rack to the cabin
- Identify whether the rack belongs behind the front seats, at the rear opening, or at another manufacturer-approved location. Do not move a location-specific system simply because another bar looks convenient.
- Check the exact vehicle configuration against the rack listing and installation manual. A 4-seat vehicle and a 6-seat vehicle do not establish shared mounting geometry.
- Identify whether the cage is original or aftermarket. Measure the outside tube diameter at each intended clamp location and compare it with the rack manufacturer’s requirements.
- Lay out every bracket, fastener, spacer, and liner shown in the instructions. Stop if a required component is missing or if the supplied hardware does not match the diagram.
Expected result: You have a documented vehicle match, an approved mounting position, and a complete hardware set. Nothing depends on forcing a clamp closed or substituting an unidentified bolt.
Compare vehicle-specific examples
These examples show why vehicle and seating details matter. They are not interchangeable choices, and the supplied product information does not establish compatibility with aftermarket cages or other installed accessories.
| Rifle rack | Best for | Useful distinction | Limitation to check |
|---|---|---|---|
| Can-Am Defender MAX Limited 1000 6-Seat Rifle Rack — Behind Front Seats | Owners of the listed Defender MAX Limited HD10 / HD11 6-seat configuration | Identifies the mounting location behind the front seats | Confirm exact vehicle fitment and clearance around your installed cab equipment |
| Polaris RZR XP 1000 4-Seat Rifle Rack — Behind Front Seats (2014–2023) | Owners of the listed 2014–2023 RZR XP 1000 4-seat configuration | Identifies both the vehicle range and behind-front-seat location | The stated historical fitment does not establish fit for a 2026 vehicle or a different cage |
R1 Industries’ UTV rifle rack selection includes both of these vehicle-specific examples. The benefit is a clearly identified starting point; the limitation is that a product title cannot replace the installation manual or an accessory-clearance check.


Clamp placement and empty-rack clearance
- Clean the intended mounting surfaces using a method compatible with the cage finish and rack instructions. Inspect the area for damage before covering it with a clamp.
- Assemble the clamps, liners, and brackets in the orientation shown by the rack manufacturer. Use only approved liners or spacers; do not add tape or improvised padding to compensate for an incorrect clamp diameter.
- Support the empty rack and start the fasteners as directed. Leave the assembly adjustable only to the extent permitted by the installation instructions.
- Check seat movement, door operation, seat-belt access, harness routing, rear-window operation, and service-panel access. Keep brackets away from wiring and moving components.
- Check the occupied cabin without a firearm in the rack. Confirm that the rack does not intrude into head space, block an exit, or obstruct the driver’s view.
Expected result: The empty rack sits in its approved position without relying on a seat, window, or trim panel for support. Occupants can enter, buckle up, and exit without working around protruding hardware.
Use this sequence for your 2026 installation: Fitment, Dry fit, Clearance, Final tightening, Inspection. Clearance comes before final tightening because moving a fully tightened rack means repeating the hardware setup.
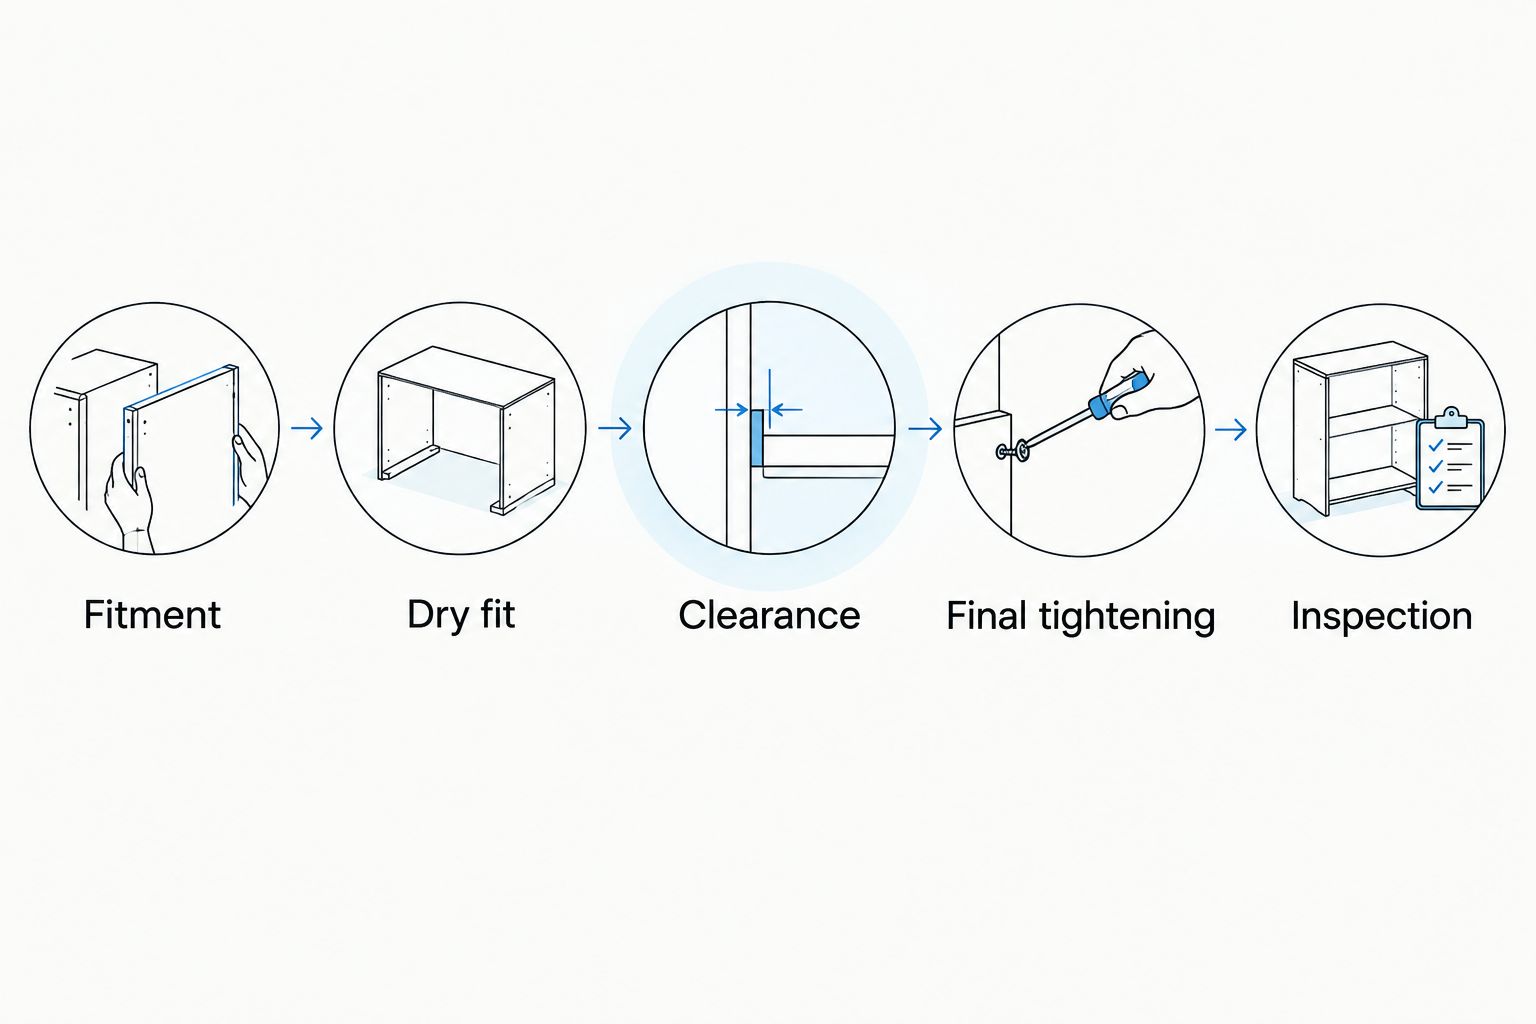
Firearm support and retention
- With the vehicle stationary and the firearm verified unloaded, check the firearm against the rack’s stated size and support requirements. Keep everyone out of the muzzle direction during this check.
- Position the firearm only as the rack manufacturer directs. Keep supports and straps clear of the trigger, trigger guard, safety, action, and other operating controls.
- Check clearance around the scope, bolt handle, stock, barrel, and any attached accessories. Include the space needed to place and remove the firearm safely, not just its resting position.
- Engage every supplied retention device according to the instructions. Check that each strap or latch closes correctly without pressing a firearm control or pulling the firearm out of its intended supports.
- Remove the unloaded firearm before making bracket adjustments. Repeat the clearance check after every change rather than assuming the previous fit still applies.
Expected result: The firearm rests in the intended supports with retention engaged and no contact with operating controls, glass, or occupants. You can remove it while maintaining a safe muzzle direction and without snagging the retention hardware.
Reject a mounting location that requires sweeping an occupant with the muzzle during normal placement or removal. Convenience does not outweigh safe handling. If the approved mounting layout cannot provide safe handling space in your cabin, choose a different compatible transport arrangement.
Final tightening and pre-ride inspection
- Remove the firearm and tighten the rack hardware in the sequence specified by the rack manufacturer. Use the stated torque and any specified thread treatment; do not copy a setting from another accessory.
- Inspect clamp seating and bracket alignment as you tighten. Stop if a clamp distorts, a liner extrudes abnormally, threads bind, or a bracket pulls out of alignment.
- Check the empty rack for movement using the manufacturer’s inspection method. A rack that rotates or slides has not passed installation, even if the fasteners feel tight.
- Repeat the door, seat, restraint, and exit checks after tightening. Confirm that no fastener end or bracket now contacts another component.
- Follow the manufacturer’s post-installation inspection and recheck schedule. Conduct any permitted initial vehicle check with the rack empty, then inspect again before transporting a firearm.
Expected result: The hardware is tightened to its own specification, the assembly remains correctly positioned, and the cabin still functions normally. Record the rack model and keep its instructions with your vehicle maintenance information.
For your 2026 pre-ride checklist, include rack security, retention condition, and clearance. Stop using the rack if you find movement, damaged supports, missing hardware, or a retention device that will not engage.
Recheck the mount whenever your setup changes
Changing a scope, stock, cab enclosure, seat, or rear window creates another fit-check workflow. The rack can remain securely mounted while the new equipment makes firearm clearance unacceptable.
- Remove the firearm and identify every component affected by the change.
- Repeat the empty-rack cabin check before adjusting the mounting position.
- Verify the firearm is unloaded, then repeat support, control-clearance, and safe-removal checks.
- If you reposition any bracket, repeat the specified tightening and inspection process.
Expected result: Your revised setup passes the same checks as the original installation. Do not treat a successful installation from an earlier trip as approval for different equipment.
A rear-opening rack also requires attention to rear-window hardware, bed access, and anything carried behind the cabin. Follow that rack’s own installation instructions rather than transferring the behind-front-seat bracket arrangement to the rear cage.
Troubleshooting
The rack rotates on the cage
Remove the firearm and stop using the rack. Check tube diameter, clamp orientation, approved liners, hardware assembly, and specified torque; do not compensate by tightening beyond the manufacturer’s limit. If movement remains, ask the rack manufacturer to confirm the application before using it again.
A clamp will not seat correctly
Check for an incorrect clamp size, misplaced spacer, trapped wiring, or interference from another bracket. Disassemble and compare the parts with the installation diagram. Never pull an incompatible clamp together by force or grind it to fit.
The firearm touches glass or a seat
Remove the firearm before adjusting anything. Recheck the approved mounting orientation and firearm-size requirements, then repeat the complete clearance check. If the conflict remains within the permitted adjustment range, the rack and cabin combination is unsuitable.
The retention strap presses a control or will not close
Stop the fit check and inspect the prescribed support positions. Confirm that the firearm and attached accessories fall within the rack manufacturer’s requirements. Do not stretch, splice, or replace a retention component with an improvised strap to make the setup work.
Customize your workflow
Build the rest of the hunting setup around the rack’s required space. Assign separate positions for ammunition, tools, recovery equipment, and loose cargo so nothing can strike the rack or interfere with firearm handling.
R1 Industries’ vehicle-specific accessories give you a place to start matching the rest of the rig. Check each addition against the installed rack rather than assuming accessories designed for the same vehicle can share the same mounting area.
For a 2026 build, finish with an equipment-change rule: any change near the rack triggers another clearance inspection. That includes cargo rearrangement, not just new hard parts.
FAQ
How do I choose a UTV gun rack roll cage mount?
Choose by exact vehicle fitment, seating configuration, approved mounting location, and cage dimensions. Then check the installation manual against your windows, roof brackets, seats, and other installed accessories.
Can I use the same gun rack on any UTV roll cage?
No, a clamp that fits one tube does not establish compatibility with another vehicle’s cage layout. Confirm tube size, bar spacing, mounting orientation, and complete vehicle fitment with the rack manufacturer.
What torque should I use on UTV gun rack clamps?
Use the torque specified by the rack manufacturer for the supplied hardware and clamp assembly. Do not substitute a generic accessory torque or increase torque to stop an incorrectly fitted clamp from slipping.
Can I drill the roll cage to install a gun rack?
Do not drill, weld, or otherwise modify a protective cage without approval from the vehicle and cage manufacturers. Use the rack’s approved attachment method and stop if installation requires an undocumented cage modification.
Should a firearm be loaded when I check rack fit?
No, verify the firearm is unloaded before every fit check and keep ammunition away from the installation area. Follow the firearm manufacturer’s unloading instructions and maintain a safe muzzle direction throughout handling.
Does a UTV gun rack make firearm transport legal?
No, installing a rack does not establish legal transport compliance. Check the current requirements for your state, route, land manager, and hunting area, including any unloading or casing requirements.
When should I inspect a cage-mounted rifle rack?
Inspect the rack before use and follow the manufacturer’s post-installation and maintenance schedule. Repeat fit and clearance checks after changing the firearm, optics, seats, windows, cage accessories, or nearby cargo.
One last thing
Check the removal path, not just the parked position. A firearm can sit neatly in a rack yet snag a scope, strap, or seat when you lift it out. Perform that unloaded handling check while stationary before calling the installation complete.
