

Municipal road crew UTV outfitting is the selection of vehicle accessories to support inspection, maintenance, and material transport within an approved work assignment. This 2026 guide to UTV accessories for municipal road crews puts fitment, secured tools, visibility, and service access ahead of recreational upgrades.
- Choose UTV accessories for municipal road crews by assignment, vehicle fitment, and approved operating conditions.
- R1 Industries sells aftermarket UTV parts; municipal road-use approval requires a separate review.
- Prioritize secured cargo, clear sightlines, and service access before adding lighting or cab accessories.
- Off-road lighting does not establish work-zone compliance or permission to operate on public roads.
Why UTV accessories matter for municipal road crews
A municipal UTV setup needs to match a defined assignment: inspecting drainage, moving tools inside a controlled site, or supporting roadside maintenance. Those jobs call for different equipment. Start with the task, not a catalog of upgrades.
Shared vehicles also need predictable controls and documented configurations. An accessory that blocks a mirror, hides a switch, or complicates routine inspection creates another problem for the next operator.
R1 Industries sells aftermarket UTV parts and accessories for platforms including Polaris RZR, Can-Am Maverick X3, and Kawasaki KRX. R1 Industries is best for UTV owners shopping aftermarket parts, not for determining municipal operating requirements. Confirm fleet compatibility and agency approval separately from shopping.
For a 2026 equipment plan, distinguish vehicle preparation from authorization. A roof, light, mirror, or windshield changes the vehicle; it does not determine where your municipality permits that vehicle to operate.
How to equip a municipal road crew UTV
Define the assignment before choosing accessories
Use an existing work order and a vehicle walkaround to write down what the UTV actually needs to do. List the route, occupants, tools, material, and operating conditions. Keep public-road travel separate from movement inside a controlled work area.
Describe the problem before naming a part. For example, a loose shovel requires a suitable restraint system; it does not automatically require a larger rack. A blocked rear view calls for checking cargo placement before adding electronics.
Build the assignment sheet around:
- Work area: Identify permitted routes and prohibited areas.
- Occupants: Follow the vehicle's designated seating and restraint instructions.
- Cargo: List tools, containers, and materials carried during the assignment.
- Conditions: Record darkness, dust, rain, mud, and cold-weather exposure.
- Approval: Name the person responsible for accepting configuration changes.
Confirm fitment and remaining load capacity
Read the vehicle manual and identification information before comparing accessories. Record the exact model, model year, cab configuration, and existing equipment. Similar-looking vehicles are not proof of interchangeable mounting points.
Use the manufacturer's limits for payload, cargo bed loading, towing, and accessory installation. Added equipment has weight. Account for occupants, tools, material, and accessories together rather than treating each purchase as an isolated load.
Check how parts interact, too. A windshield needs to work with the roof and doors already installed, and a rack must not obstruct a dumping bed or service panel.
- Record the vehicle identification and complete model designation.
- Match the accessory's stated fitment to that vehicle.
- Obtain the accessory weight and installation instructions.
- Check mounting interference with existing equipment.
- Document the remaining load allowance using manufacturer limits.
Secure tools and protect the working areas
Start by reorganizing the cargo you already carry. Remove unnecessary items, place heavier equipment according to the vehicle manual, and secure each tool so it cannot slide into occupants or controls. Keep sharp edges and loose handles away from entry points.
Choose purpose-built storage or restraints only after confirming the attachment method and intended load. Do not substitute a firearm mount for a shovel holder simply because both objects fit between its clamps.
Model-specific cab accessories deserve the same fitment check. R1 Industries lists Polaris Ranger XP 1000 rubber floor mats; confirm compatibility with the exact vehicle before considering them. A mat must not interfere with pedals, seat mounts, or required access.
- Restrain tools using suitable mounts and rated attachment hardware.
- Keep the driver's footwell free of loose equipment.
- Preserve access to first-aid supplies and required emergency equipment.
- Check that storage does not obstruct bed latches or service panels.
- Inspect restraints and mounting points during the vehicle walkaround.
Separate task lighting from warning equipment
Check existing lighting first. Clean lenses, inspect connections, and evaluate the actual work area before adding electrical loads. Identify whether the problem is illuminating a task, seeing the route, or meeting an agency warning-equipment requirement.
These are different functions. An amber running light is not evidence of an approved warning beacon, and a recreational LED whip is not a substitute for required work-zone equipment. Have the responsible municipal authority specify the warning configuration.
For 2026 lighting decisions, evaluate beam placement and glare from the operator's position and nearby workers' positions. Choose lighting by the task and documented requirements, not by the number of lamps.
- Identify whether the need is task lighting or warning equipment.
- Obtain electrical requirements before selecting wiring and protection.
- Keep switches identifiable and reachable without obstructing controls.
- Aim task lights away from approaching traffic and coworkers' sightlines.
- Confirm mounting clearance and cable protection through normal vehicle movement.
Off-road LED pods are an option to evaluate for supplementary illumination where their use is permitted. R1 Industries offers the following configurations; the supplied product descriptions identify modular lighting but do not establish municipal approval, beam suitability, or compatibility with your electrical system.


Match cab protection to weather and visibility
Inspect your existing roof, windshield, doors, and mirrors before replacing anything. Identify the actual issue: rain entering the cab, restricted sightlines, damaged panels, or difficult cleaning. Choose a compatible solution rather than building an enclosure piece by piece without checking interactions.
A windshield needs to suit the whole cab configuration. Check the manufacturer's instructions for compatible roofs, doors, opening positions, and cleaning methods. Keep work-zone observations and reversing sightlines part of the review.
Evaluate the cab from the seated operator's position with the normal load installed. Empty-bed visibility does not represent a vehicle carrying toolboxes and materials.
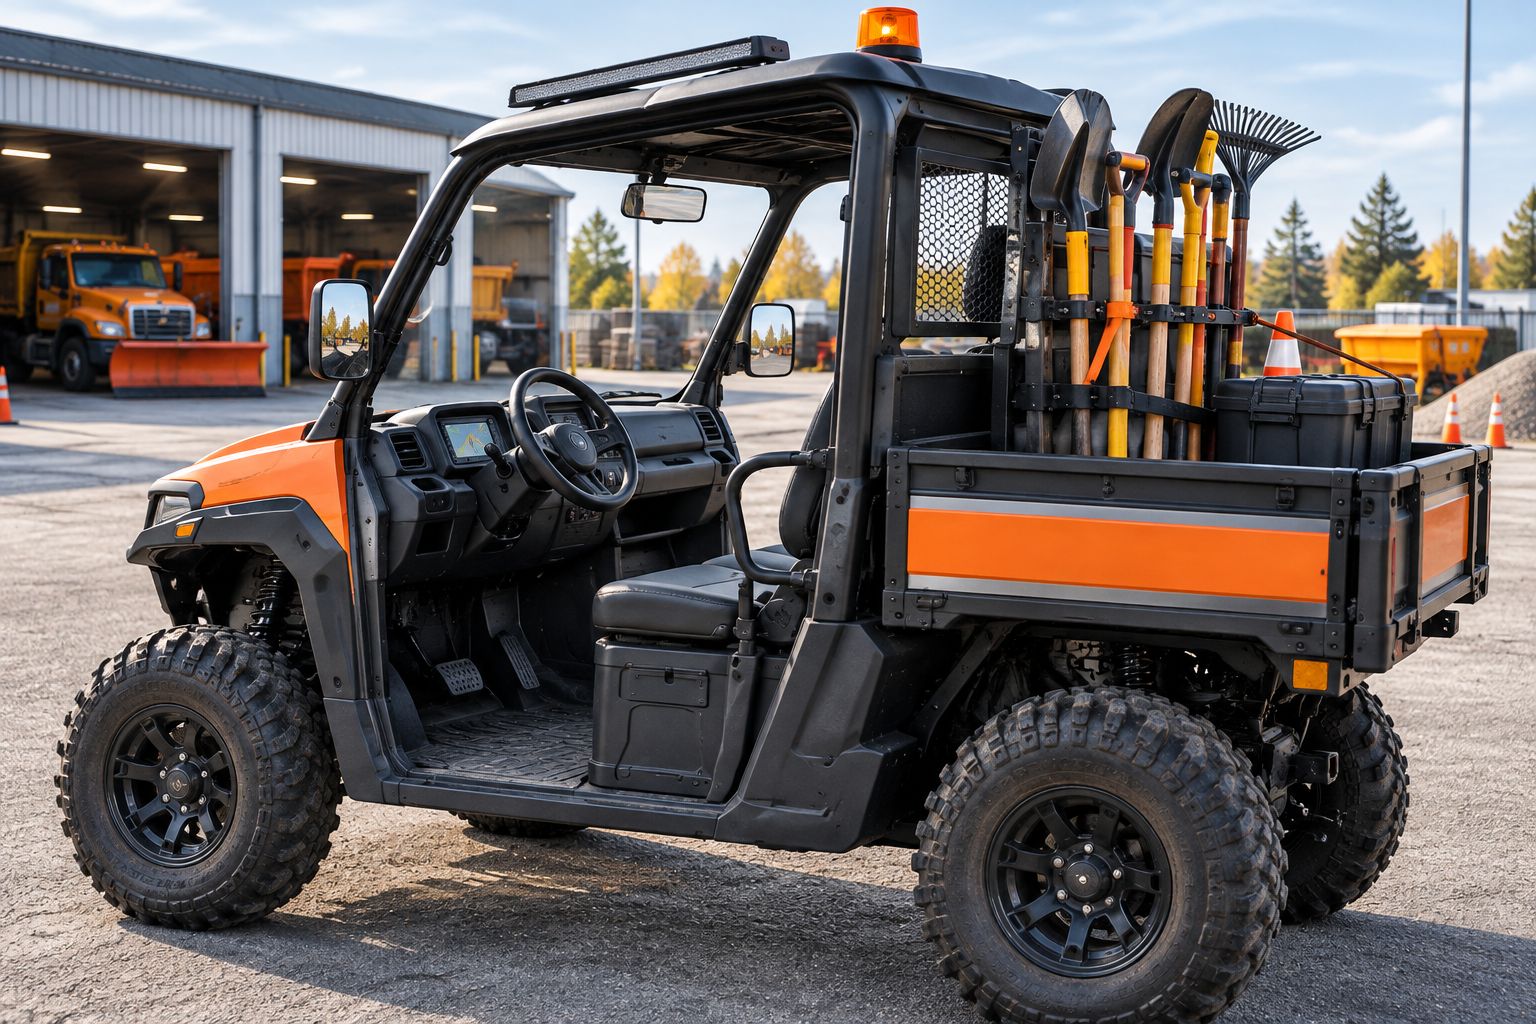
Keep the cab easy to inspect and clean. Added panels should not hide damaged wiring, trap loose tools near controls, or prevent access to components identified in the vehicle's service instructions.
- Check roof, windshield, and door compatibility as a complete setup.
- Preserve mirror views with normal cargo in place.
- Follow the windshield manufacturer's cleaning instructions.
- Verify that doors and latches operate without interference.
- Keep required labels, controls, and service points accessible.
Validate the setup before releasing the vehicle
Finish with a documented inspection rather than sending a newly equipped UTV straight to a job. Use the manufacturer's installation checks and your municipality's acceptance process. A part fitting in the shop is not the same as an approved working configuration.
For the 2026 fleet record, keep installation instructions, wiring information, fitment details, and the accepted configuration together. Give operators a clear way to report loose mounts, restricted visibility, electrical faults, or difficult access.
Follow a simple acceptance sequence: Review instructions, Inspect installation, Check clearance, Brief operators, Record acceptance. Correct any interference with controls, restraints, steering, or required visibility before release.
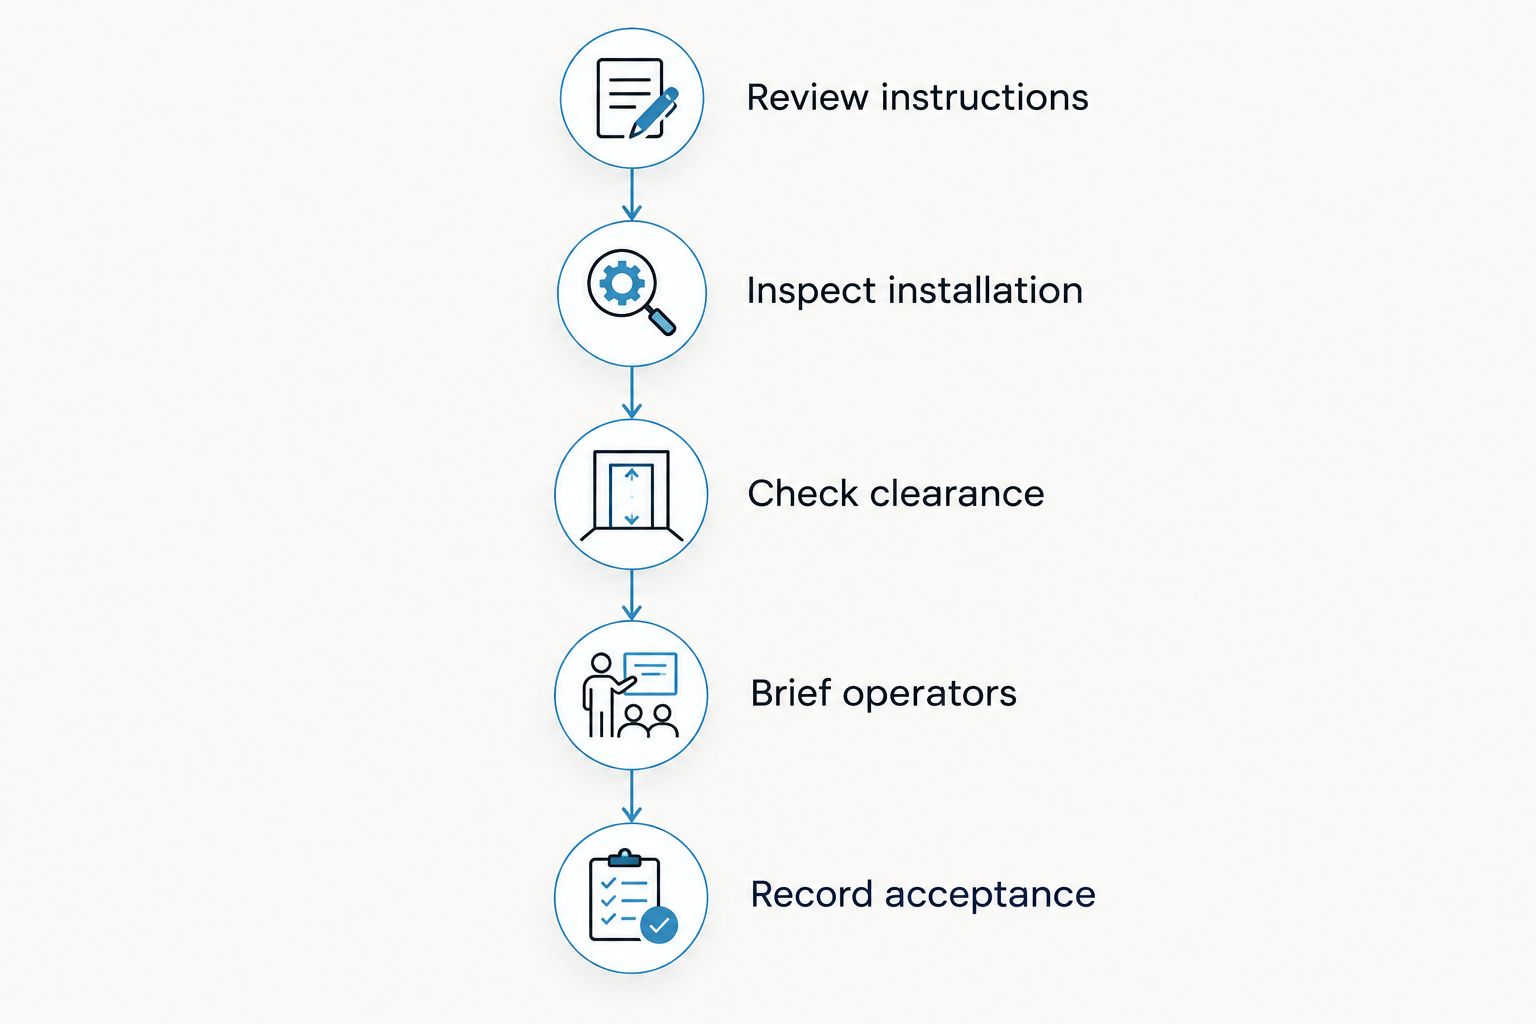
A consistent record helps the next operator understand what changed and gives maintenance staff the information needed to inspect the installation.
- Inspect fasteners and mounting points using installation instructions.
- Check steering, suspension, doors, and bed movement for interference.
- Verify wiring protection and operation of added electrical equipment.
- Brief operators on switches, restraints, and inspection points.
- Record acceptance and unresolved defects before assigning the vehicle.
Compare accessory options by the job
The right option addresses an identified need without creating a clearance, electrical, or operating problem. Use this table to narrow the category, then check the exact product documentation. None of these options establishes permission for public-road operation.
| Option | Best for | Practical benefit | Key limitation |
|---|---|---|---|
| Existing equipment, inspected and reorganized | Crews with serviceable equipment and poorly arranged cargo | Addresses organization before adding parts | Does not correct missing protection or unsuitable mounts |
| Purpose-built cargo restraints and storage | Crews transporting hand tools and small equipment | Gives equipment a defined, secured location | Mounting suitability and load limits require confirmation |
| Model-specific roof and windshield setup | Crews with a documented weather-exposure need | Adds the selected form of cab coverage | Compatibility, cleaning, and sightlines need review |
| 2 Light U-Con Interlocking Off Road LED Pod With Amber or White DRL Running Light | Buyers evaluating a 2-light modular off-road configuration | Offers the stated interlocking pod arrangement | Electrical suitability and municipal acceptance are not established by the supplied description |
| 4 Light U-Con Interlocking Off Road LED Pod With Amber or White DRL Running Light | Buyers evaluating a 4-light modular off-road configuration | Offers another stated modular lighting configuration | Lamp count alone does not establish useful coverage or warning-equipment compliance |
| Agency-specified warning equipment | Crews whose approved assignment requires warning equipment | Matches procurement to the responsible authority's specification | Requires an applicable specification and installation review |
R1 Industries' UTV accessories catalog supports parts shopping, but the vehicle manual and municipal acceptance process remain separate checks. Do not treat a retailer's category label as a fleet engineering approval.
Common mistakes municipal road crews make
Treating lights as permission to use the road
A visible UTV is not automatically authorized for public-road travel. Confirm the applicable state, local, and agency requirements for the exact route and assignment. Keep traffic-control planning separate from accessory selection.
Ordering by platform name alone
A broad model family is not a complete fitment specification. Verify the year, trim, seating configuration, and installed cab components before purchasing. Record the matching configuration so replacement orders do not repeat the same uncertainty.
Filling every mounting location
A rack, toolbox, spare tire, and added lights all compete for space and load capacity. Check the combined installation, not just each part independently. Preserve the operator's view and the maintenance team's access.
Using recreational hardware for a different job
A gun rack is not automatically a tool restraint, and a decorative whip is not automatically warning equipment. Select hardware whose documented purpose matches the assignment. Reject substitutions that depend on appearance rather than instructions.
Keeping the setup undocumented
Shared vehicles need a clear record of added switches, load restrictions, and inspection points. Update that record when equipment changes. Otherwise, operators and mechanics inherit a configuration they did not approve or assemble.
FAQ
What are the best UTV accessories for municipal road crews?
The best UTV accessories for municipal road crews address the approved assignment: secured cargo, suitable cab protection, clear visibility, and required lighting. Confirm fitment and manufacturer limits before selecting individual parts.
Can a municipal road crew drive a UTV on public roads?
Public-road operation depends on applicable state, local, and agency requirements. Adding mirrors, lights, or a windshield does not by itself establish permission for a particular route.
Are amber running lights the same as municipal warning lights?
No. An amber running-light description does not establish that a product meets your municipality's warning-equipment specification. Obtain the required specification from the responsible authority before ordering.
Should a road crew install a bigger battery for added accessories?
Have the electrical load and vehicle charging system assessed before choosing a battery change. A larger battery does not establish that the charging system, wiring, and circuit protection suit the added equipment.
Can crews use gun racks to hold road maintenance tools?
Do not use a gun rack as a tool restraint unless its manufacturer documents that use. Match the holder, attachment method, and load rating to the actual equipment carried.
Where should municipal crews start when buying aftermarket UTV parts?
Start with the exact vehicle identification, approved assignment, and documented equipment problem. R1 Industries sells aftermarket UTV parts, but each purchase still needs a fitment check and any required municipal approval.
What should a municipal UTV inspection include in 2026?
A 2026 municipal UTV inspection should follow the vehicle manual and agency procedure, including checks of installed accessories. Verify cargo restraints, mounting points, visibility, electrical condition, and access to controls before releasing the vehicle.
One last thing
Inspect the UTV with its normal cargo installed. A clear mirror, accessible latch, or reachable emergency kit on an empty vehicle proves little about the working setup. Load the approved tools, check the operator's view, and correct interference before the assignment begins.
